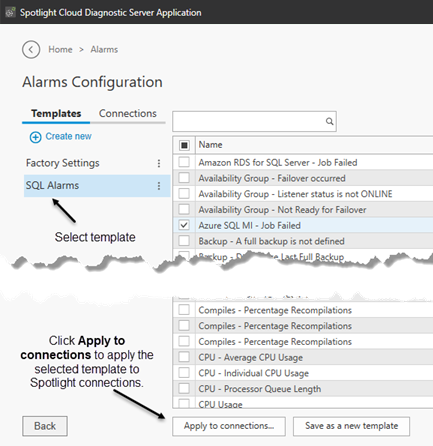
Configure alarms dialog
The Apply configuration to… button is at the bottom of the alarms dialog. Click this button to apply this same configuration to other connections.

The dialogs below now open:
- Choose the alarms to apply.
- Select the connections to apply.
Select the Spotlight Factory Settings Template to reapply the default alarm configurations.
Configure Alarms
This dialog is opened as one of a series when using the Apply configuration to… button to re-apply the configuration. The table lists all alarm configurations for the connection type. By default all configuration items are selected (ticked). All will be applied. Click on a tick to deselect a configuration item so it won’t be applied.
Tick
Spotlight Cloud will apply the items that are ticked (selected). If you do not want Spotlight Cloud to apply this item then click on the tick to de-select it.
Name
The name of the alarm.
Type
The connection type
Customized
Yes
This item has been customized and its configuration is not the same as the factory settings template.
No
This item is configured as per the factory settings template.
Configure connections
This dialog is opened as one of a series when using the Apply to connections… button to re-apply the configuration. Select the connections to re-apply the configuration to.
Type
The connection type: Hyper-V, SQL Server, Windows Server etc.
Search
Optionally, use the search field to search for Spotlight connections. Type text in this field to find connections by their name, type or tag.
Select
Select from the connections monitored by Spotlight Cloud. This list is adjusted as applicable to the configuration to be applied. For example, a Spotlight Cloud configuration for a SQL Server instance can be applied to other SQL Server instances, but may not be applicable to Windows Server connections.
Selected
The Selected Connections list is a list of the connections that you have selected. The configuration will be applied to these connections.
To remove a connection from this list, select the connection and click Remove.
Click Back, Cancel or Finish from the options at the bottom of the screen.